How to Sprout Grains, Legumes or Nuts

0
Comments (38)

I have an obsession with sprouting grains and legumes. I think it's related to my obsession of inviting nature take its sweet time to process your raw ingredients in it's own special way. Sprouting instead of cooking has many advantages if you have the roughly three days to spare. Supplanting puréed sprouted grains for some or all of your flour is also a great way to make hearty breads.
Find Wild-yeasted recipes on Veganbaking.net
The Benefits of Sprouting
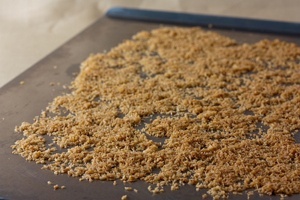
Sprouting, also known as malting involves giving your grains, legumes or nuts, which are basically just seeds, a chance to germinate. Due to this I'm going to refer to grains, legumes and nuts as seeds from here on out. Germination is the process that the seed is designed for. During this critical time in the plant's life nutrients are released to aid the seed's establishment as a plant and the seed softens. During this time flavor compounds are also released. This flavorful, softened seed that's jam packed with nutrients is what we're after. This is a pretty stark contrast to flour which is unsprouted grains that have been ground into a nearly tasteless dust. For hearty breads, using finely milled sprouted grains like wheat, rye and spelt can be a much healthier and tasty option. It will make breads that are extremely dense and fibrous though so if you don't prefer those types of bread (which I jokingly refer to as rock and stick bread) you may want to explore the benefits of sprouting things like chickpeas for hummus instead.Note that sprouted seeds are often not soft enough to be consumed on their own. They may need to be milled in a food mill, puréed in a food processor or (gasp!) cooked further in order to be edible. When making things like hummus or sprouted breads for example, milling or puréeing the seeds is perfectly adequate. When making sprouted wheat breads, milling is preferred over processing because it grinds the seed into smaller particles which will make for a lighter, springier loaf. Be sure to use seeds that have not been toasted or cooked in any way. Heating seeds deactivates them and inhibits their ability to sprout.
To Sprout Seeds
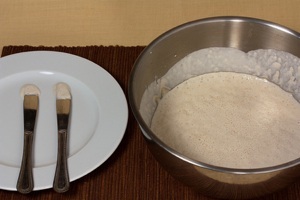
There are many fancy seed sprouting jars on the market specifically designed for sprouting. They're great if you already have them but not necessary; I simply use a wire mesh colander placed on a plate which serves the same purpose.1) Soak
Rinse your seeds to remove any foreign particles. Soak them in a bowl of water for 12 to 24 hours. It's important to have an inch or two of water over the seeds because they will expand as they absorb the water.2) Drain and rinse
Drain and rinse the seeds in a colander that has holes small enough so that only water can escape. Place the colander of on a plate to collect any water that will drain off.3) Rinse about three times per day for about three days
Rinse your seeds two to three times per day by putting the colander under running water and using your hands to mix them around. Place the colander on the plate in between rinses. After one to three days, depending on temperature and humidity of your environment and the condition of your seeds, you'll start to see a sprout on most of them.How Much Do I Sprout?
It's important to note that during the sprouting process most but not all of your seeds will sprout. If you're sprouting grains for bread you'll want the actual sprout to be about 1 millimeter long. This is where you really want to pay attention because once the sprout gets going it starts to grow really fast. This can be slowed down somewhat by placing the them in the refrigerator. Sprouts on grains in excess of 3 millimeters will start to make your finished bread doughy in consistency. When sprouting grains for bread, sprout length is more important than the number of germinated grains. If you're sprouting legumes such as chickpeas, look for a sprout that's 1 to 3 millimeters in length. The main goal when sprouting legumes is to have as many of them sprouted as possible.Once your seeds have sprouted to your liking you need to purée or cook them as soon as possible to stop the sprouting process. I recommend against cooking if you're making something that's going to remain raw like sprouted hummus; keeping them raw will leave more nutrients intact. Once puréed or cooked the seeds can be used immediately or refrigerated in a covered container for several days until ready to be used.
Although using nature to aid you in preparing your seeds is a more time consuming process, it's flavor, texture and nutrient advantages make it worth it for hearty foods.